What is Webcam? Working, Features and Benefits
Published: 10 Nov 2026
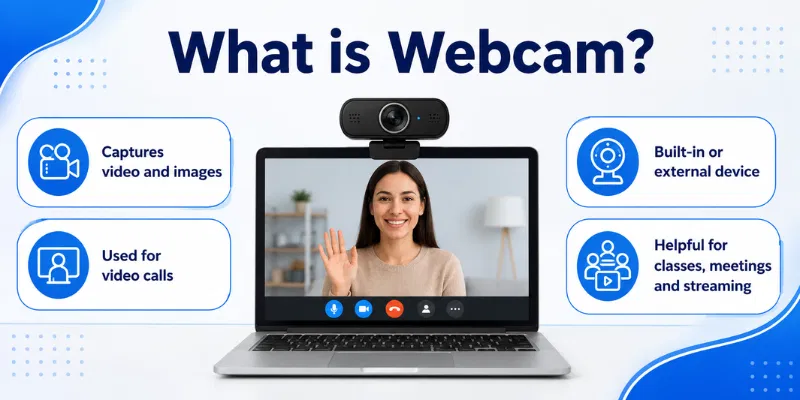
A webcam is a small digital camera that captures live video and sends it to a computer or online platform. It is commonly used for video calls, online classes, business meetings, streaming, and recording. If you are wondering What Is Webcam, it can be built into a laptop or connected externally through a USB port. Modern webcams may also include microphones, autofocus, light correction, and privacy covers.
1. What Is Webcam?
A webcam is a small digital camera used to capture live video through a computer, laptop, tablet, or other compatible device. It allows users to communicate visually during video calls, online classes, virtual meetings, interviews, and live streams. Many modern laptops have a built-in webcam, while desktop users can connect an external webcam through a USB port.
When people ask What Is Webcam, it is important to understand that it is mainly designed for real-time communication. Unlike a traditional camera, a webcam usually sends video directly to an application such as Zoom, Google Meet, Microsoft Teams, or Skype. It can also record videos, take photos, and support content creation.
2. Working of Webcam
A webcam works by capturing light through its lens and directing it toward an image sensor inside the camera. The image sensor converts this light into digital signals, which are then processed into a video image. After that, the webcam sends the video data to the computer through an internal connection or a USB cable. The computer’s camera software or video-calling application receives this data and displays the live video on the screen. If the webcam has a built-in microphone, it also records sound and sends it with the video. Features such as autofocus, brightness correction, colour adjustment, and noise reduction may further improve the final output before it is shared during a call, recording, or live stream.
3. Main Parts of a Webcam
A webcam contains several important parts that work together to capture video, record sound, process images, and send data to a computer. Understanding these components makes it easier to know how a webcam produces live footage and why video quality differs between models.
1. Lens
The lens collects light from the subject and focuses it onto the image sensor. Its quality affects video sharpness, viewing angle, and overall image clarity.
2. Image Sensor
The image sensor converts incoming light into digital signals. It plays an important role in resolution, colour accuracy, and low-light performance.
3. Built-In Microphone
Many webcams include a built-in microphone for recording voice and surrounding sound. It allows users to join video calls without connecting a separate microphone.
4. Indicator Light
The indicator light turns on when the webcam is active. It helps users know when the camera is recording or being used by an application.
5. Internal Processor
The internal processor handles colour, brightness, exposure, focus, and video compression. It helps improve the footage before sending it to the computer.
6. USB Cable or Connector
External webcams use a USB cable or connector for power and data transfer. Built-in webcams connect directly to the device through internal wiring.
7. Mounting Clip or Stand
The mounting clip helps attach the webcam securely to a monitor or laptop. Some models also support desk stands or tripods for better positioning.
4. Types of Webcam
Webcams are available in different types based on their design, connection method, features, and intended use. Some are built directly into devices, while others are connected separately for better quality and flexible positioning. Understanding the main types can help users choose the right webcam for video calls, online classes, streaming, meetings, or security purposes.
1. Built-In Webcam
A built-in webcam is installed inside a laptop, tablet, monitor, or all-in-one computer. It is convenient because users do not need to connect any extra device. However, its video quality, viewing angle, and positioning options may be limited compared with external models.
2. External Webcam
An external webcam connects to a computer through USB or another supported port. It usually offers better resolution, autofocus, microphone quality, and low-light performance. Users can also move or adjust it easily for a better camera angle.
3. Wireless Webcam
A wireless webcam connects through Wi-Fi or Bluetooth instead of using a direct cable connection. It provides more freedom in placement and can reduce cable clutter. However, its performance may depend on battery life, connection stability, and network speed.
4. Streaming Webcam
A streaming webcam is designed for live streaming, gaming, content creation, and online broadcasting. It often supports Full HD or 4K resolution, higher frame rates, autofocus, and advanced light correction. These features help creators produce smoother and more professional-looking video.
5. Conference Webcam
A conference webcam is made for business meetings and group video calls. It usually has a wide field of view so several people can appear in the frame. Many models also include multiple microphones, speaker tracking, and automatic framing features.
6. Security Webcam
A security webcam is used for basic monitoring of homes, offices, or indoor spaces. It may include motion detection, remote viewing, recording, and night-vision support. However, it is generally less advanced than a dedicated CCTV or professional security camera system.
7. 4K Webcam
A 4K webcam captures highly detailed video at 3840 × 2160 resolution. It is suitable for professional meetings, recording, streaming, and content creation where image quality matters. However, it requires faster internet, stronger hardware, and more storage than lower-resolution webcams.
5. Types of Webcam Resolution
Webcam resolution refers to the number of pixels used to create the video image. A higher resolution usually provides sharper details and clearer footage, but it may also require faster internet, stronger hardware, and more storage. The right option depends on whether the webcam is used for basic calls, online classes, professional meetings, streaming, or video recording.
1. 480p Resolution
A 480p webcam provides basic standard-definition video quality. It is suitable for simple video calls when internet speed is limited. However, the image may look soft or unclear on larger screens.
2. 720p HD Resolution
A 720p webcam records video at 1280 × 720 pixels. It provides better clarity than 480p and is commonly found in budget laptops and entry-level webcams. This resolution is suitable for online classes, casual calls, and basic meetings.
3. 1080p Full HD Resolution
A 1080p webcam records at 1920 × 1080 pixels and provides a sharper, more professional image. It is a popular choice for business meetings, interviews, teaching, and live streaming. A stable internet connection and proper lighting help users get the best results.
4. 1440p QHD Resolution
A 1440p webcam offers more detail than Full HD. It is useful for content creators, professional presentations, and users who want clearer video on larger screens. However, it may need more bandwidth and stronger computer performance.
5. 4K UHD Resolution
A 4K webcam records at 3840 × 2160 pixels and delivers highly detailed footage. It is mainly used for professional streaming, high-quality recording, product demonstrations, and content creation. The user also needs powerful hardware, fast internet, and suitable software to benefit fully from this resolution.
6. 5K and Higher Resolution
Some premium webcams support 5K or even higher resolutions. These models are designed for advanced creators and professional production work. For most everyday users, the extra detail may not be necessary because video-calling platforms often reduce the final quality.
6. Important Webcam Features
Webcam features directly affect video clarity, sound quality, camera positioning, and overall performance. Some features are useful for simple video calls, while others are more important for professional meetings, streaming, teaching, or content creation. Understanding these features can help users choose a webcam that matches their needs and budget.
1. Video Resolution
Video resolution determines how much detail appears in the webcam footage. Common options include 720p, 1080p, 1440p, and 4K. A higher resolution usually produces a sharper image, but it also requires faster internet and stronger hardware.
2. Frame Rate
Frame rate shows how many images the webcam captures every second. It is measured in frames per second, such as 30 fps or 60 fps. A higher frame rate makes movement look smoother, which is useful for streaming, gaming, and active presentations.
3. Autofocus
Autofocus automatically keeps the face or subject clear when the user moves. It is especially helpful during demonstrations, online teaching, and product presentations. A webcam without good autofocus may produce blurry video when the distance changes.
4. Field of View
The field of view controls how much of the room appears in the video frame. A narrow angle is suitable for one person, while a wider angle is better for group meetings. Some webcams allow users to switch between different viewing angles.
5. Low-Light Performance
Low-light performance shows how well the webcam works in a dim room. A good sensor and automatic exposure can brighten the image without creating too much grain or noise. However, proper front lighting still gives better results than relying only on camera correction.
6. Built-In Microphone
Many webcams include one or more microphones for recording voice. Advanced models may offer noise reduction, stereo sound, or directional audio. A built-in microphone is convenient, but a separate microphone may provide clearer sound for professional recording.
7. Privacy Shutter
A privacy shutter physically covers the webcam lens when it is not being used. It provides extra protection against accidental or unauthorized camera access. Some webcams include a built-in shutter, while others require a separate camera cover.
7. Built-In Webcam vs External Webcam
Built-in and external webcams both support video calls, online classes, meetings, and recording. However, they differ in video quality, flexibility, features, and price. The comparison below can help users understand which option is more suitable for their needs.
| Feature | Built-In Webcam | External Webcam |
|---|---|---|
| Installation | Already installed inside the laptop or monitor | Connected separately through USB or another port |
| Video Quality | Usually offers basic or average video quality | Often provides clearer and higher-resolution video |
| Positioning | Has a fixed position and limited adjustment | Can be moved, tilted, or placed at eye level |
| Features | Usually includes fewer advanced features | May include autofocus, light correction, zoom, and privacy shutter |
| Portability | Always available with the device | Must be carried separately |
| Price | Included in the device’s total cost | Requires an additional purchase |
| Best Use | Suitable for casual calls, classes, and basic meetings | Better for professional meetings, streaming, and content creation |
8. Advantages and Disadvantages of Webcam
Webcams make online communication easier by allowing users to share live video during meetings, classes, interviews, and personal calls. However, they also have some limitations related to privacy, video quality, internet speed, and device performance. Understanding both sides can help users decide whether a webcam is suitable for their needs.
| Advantages of Webcam |
|---|
|
| Disadvantages of Webcam |
|---|
|
9. How to Set Up a Webcam
Setting up a webcam is usually simple and takes only a few minutes. Built-in webcams are already connected to the device, while external webcams must be plugged into a compatible port. Follow these steps to make sure the camera, microphone, permissions, and video settings work correctly.
1. Connect the Webcam
Plug the external webcam into an available USB port on your computer or laptop. Make sure the connection is secure and avoid using a damaged cable or loose port. Built-in webcam users can skip this step.
2. Allow the Device to Detect It
Most modern operating systems automatically detect a newly connected webcam. Wait a few moments while the system installs the basic drivers. A notification may appear when the camera is ready to use.
3. Install Official Drivers or Software
Some webcams require additional drivers or software for advanced features. Download them only from the official manufacturer’s website. The software may provide controls for resolution, focus, brightness, zoom, and frame rate.
4. Enable Camera Permissions
Open the privacy settings on your device and allow camera access. Make sure the video-calling or recording application also has permission to use the webcam. Without permission, the camera may show a black screen or fail to open.
5. Select the Correct Webcam
Open Zoom, Google Meet, Microsoft Teams, or another required application. Go to its video settings and select the correct webcam from the available camera list. This is important when the device has both built-in and external cameras.
6. Check the Microphone
Select the webcam’s built-in microphone if you plan to use it for sound. Speak normally and check whether the input-level indicator moves. Use a separate microphone when the webcam audio sounds unclear or records too much background noise.
7. Test the Video
Open the camera preview and check the image for blur, darkness, delay, or flickering. Adjust the webcam position so it remains close to eye level. Make sure your face is properly centred and clearly visible.
8. Improve the Lighting
Place a soft light source in front of you instead of behind you. Bright windows or lamps behind the user can make the face appear dark. Proper lighting often improves webcam quality more than changing software settings.
9. Adjust Video Settings
Choose a suitable resolution and frame rate based on your internet speed and device performance. A 720p or 1080p setting is enough for most calls, classes, and meetings. Reduce the resolution when the video freezes or the connection becomes unstable.
10. Secure the Webcam
Close the application after completing the setup and review its camera permissions. Use a privacy shutter or camera cover when the webcam is not in use. This provides additional protection against accidental or unauthorized access.
10. How to Test a Webcam
Testing a webcam helps confirm that the camera, microphone, permissions, focus, and video quality are working correctly. You should test it before an online class, job interview, business meeting, or live stream. Follow these seven simple methods to identify and fix common problems before using the camera.
1. Open the Built-In Camera App
Open the Camera application available on your computer or laptop. If the webcam is working correctly, your live video should appear within a few seconds. A black screen or error message may indicate blocked permissions, missing drivers, or another application using the camera.
2. Use a Webcam Tester
Open a trusted Webcam Tester through your browser and allow camera access when requested. The tool should display a live preview and may provide details about the camera resolution and frame rate. Avoid using unknown websites that request unnecessary personal information or additional permissions.
3. Check the Video Quality
Observe whether the video looks clear, smooth, and properly coloured. Look for common problems such as blur, grain, delay, flickering, or unusual colour tones. Clean the lens and improve the lighting if the footage appears unclear.
4. Test the Autofocus
Move slightly closer to and farther away from the camera. A webcam with autofocus should adjust and keep your face or subject clear. If the image remains blurry, check the focus settings or manually adjust the focus when the model supports it.
5. Test the Built-In Microphone
Record a short video or use the sound settings to check the microphone. Speak at a normal volume and confirm that the input-level indicator responds. Play the recording to check for low volume, background noise, distortion, or interruptions.
6. Test It Inside the Required Application
Open the video-calling application you plan to use, such as Zoom, Google Meet, or Microsoft Teams. Go to its video settings and select the correct webcam from the camera list. Use the preview option to confirm that both video and audio work properly inside that specific application.
7. Check Camera Permissions
Open your device’s privacy settings and make sure camera access is enabled. Confirm that the required browser or application has permission to use the webcam. Restart the application after changing permissions, and test the camera again to verify that the problem is resolved.
11. How to Improve Webcam Quality
Webcam quality depends on lighting, camera position, internet speed, resolution, focus, and background setup. You do not always need an expensive camera to look clearer during meetings, classes, interviews, or live streams. A few simple adjustments can greatly improve both video and sound quality.
1. Use Proper Lighting
Place a soft light source in front of your face instead of behind you. Avoid sitting directly in front of a bright window because it can make your face look dark. Natural daylight or a small desk light can improve clarity and reduce shadows.
2. Clean the Webcam Lens
Dust, fingerprints, and smudges can make the video look blurry or faded. Gently clean the lens with a soft microfiber cloth before important calls. Avoid using rough materials or spraying liquid directly onto the camera.
3. Position the Camera at Eye Level
Place the webcam close to your eye level for a more natural and professional angle. A low camera position can create an unflattering view, while a very high position may feel unnatural. Use a laptop stand, books, or a tripod to adjust the height.
4. Improve the Internet Connection
A slow or unstable internet connection can cause blurry, delayed, or frozen video. Move closer to the Wi-Fi router or use an Ethernet cable when possible. Close unnecessary downloads, streaming services, and background applications during video calls.
5. Select the Right Resolution
Choose 720p or 1080p based on your internet speed and device performance. Higher resolution can improve detail, but it may also cause lag on weaker connections. Use 1080p for clear professional video and reduce it when the call becomes unstable.
6. Adjust Focus and Exposure
Make sure your face remains clear and properly exposed. Enable autofocus if your webcam supports it, and adjust brightness, contrast, or exposure through the camera software. Avoid over-brightening the image because it can remove facial details.
7. Use a Simple Background
Keep the area behind you clean, organised, and free from distractions. A plain wall or tidy workspace helps the camera focus better on your face. Avoid moving objects, bright lights, or cluttered backgrounds.
8. Update Webcam Drivers
Outdated drivers may reduce camera performance or cause video problems. Install updates from the official webcam or computer manufacturer. Restart the device after updating and test the video again.
9. Improve Audio Quality
Clear sound is just as important as clear video. Sit in a quiet room, reduce background noise, and keep the microphone close enough to your voice. Use an external microphone or headset when the built-in microphone sounds weak or unclear.
10. Close Unnecessary Applications
Running too many applications can slow down the computer and affect video quality. Close games, editing software, downloads, and unused browser tabs before a call. This frees up system resources and helps the webcam run more smoothly.
12. Common Webcam Mistakes
- Using poor or back-facing lighting
- Placing the webcam below eye level
- Forgetting to clean the camera lens
- Ignoring microphone and permission settings
- Skipping the webcam test before meetings
Yes, a 720p webcam is suitable for basic meetings, classes, and personal video calls. It can provide acceptable quality when the lighting and internet connection are good. However, 1080p is better for professional meetings and interviews.
A dirty lens, poor lighting, weak autofocus, or incorrect settings can make the video blurry. Clean the lens and place a soft light source in front of your face. Also check whether the correct resolution and camera are selected.
Yes, a webcam can take photos or record videos without internet access. The footage can be stored directly on your computer through a camera application. An internet connection is only required for online calls, meetings, and live streaming.
An external webcam usually offers better resolution, positioning, autofocus, and low-light performance. A built-in camera is more convenient because it is already installed inside the device. The better choice depends on your budget and intended use.
The webcam may not be detected because of a loose connection, blocked permission, missing driver, or faulty USB port. Reconnect the camera and try another compatible port. You should also update the official driver and restart the computer.
Unauthorized access is possible if the device contains malware or unsafe software. Keep the operating system updated and allow camera access only to trusted applications. Use a privacy shutter or camera cover when the webcam is not in use.
Close unnecessary applications, downloads, and browser tabs before starting the call. Use a stable Wi-Fi connection or connect the computer through an Ethernet cable. Reducing the video resolution may also improve performance on a slower connection.
Conclusion
So guys, in this article, we’ve covered What Is Webcam in detail. A webcam makes video calls, online classes, meetings, interviews, recording, and live streaming easier by capturing and sharing live video. Personally, I recommend choosing a 1080p webcam with autofocus, a privacy shutter, and good low-light performance for clear everyday use. Complete a Test of Webcam before every important call and improve your setup for a better video experience.

- Be Respectful
- Stay Relevant
- Stay Positive
- True Feedback
- Encourage Discussion
- Avoid Spamming
- No Fake News
- Don't Copy-Paste
- No Personal Attacks
- Be Respectful
- Stay Relevant
- Stay Positive
- True Feedback
- Encourage Discussion
- Avoid Spamming
- No Fake News
- Don't Copy-Paste
- No Personal Attacks
