How to Fix a Stuck Pixel of Screen Safely?
Published: 29 Oct 2026
Have you noticed a bright colored dot that stays in the same place even when the image changes? You may be unsure whether it is a stuck pixel, a dead pixel, or another display problem. Understanding How to Fix a Stuck Pixel issues can help you identify the defect and choose the correct solution. This article covers safe testing and repair methods for different screen devices.
1. What Is a Stuck Pixel?
A stuck pixel is a tiny point on a digital screen that remains fixed on one color, such as red, green, blue, or white. It happens when one or more subpixels continue receiving power but fail to change according to the displayed image. The pixel stays in the same position across videos, applications, and different backgrounds. Unlike a dead pixel, a stuck pixel is not completely inactive and may sometimes return to normal. Learning How to Fix Stuck Pixel problems begins with confirming the defect through solid-color screen tests.
2. Working of a Stuck Pixel
A digital screen contains millions of pixels, and each pixel usually has red, green, and blue subpixels. These subpixels change their brightness to create different colors on the display. When one or more subpixels stop responding correctly to electrical signals, they remain active on the same color. As a result, the affected pixel may stay red, green, blue, or white even when the screen image changes. Since the pixel still receives power, it is not completely dead and may sometimes recover through restarting, driver updates, or pixel-refreshing methods.
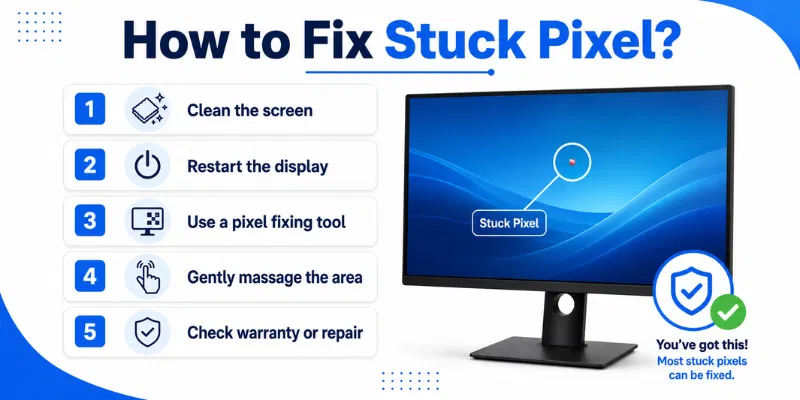
3. How to Fix a Stuck Pixel
A stuck pixel may appear as a small red, green, blue, or white dot that remains in the same place on the screen. Since it still receives power, there is a possibility that it may start working normally again. However, no method guarantees success, especially if the pixel has remained stuck for a long time. Start with safe troubleshooting methods and check the affected area after every step.
1. Restart the Device
A temporary software or graphics error may stop a subpixel from changing colors correctly. Restarting the device closes background processes and reloads the operating system, display driver, and graphics services. This can restore the correct signal without changing any settings.
After restarting, open solid black, white, red, green, and blue backgrounds. Check whether the pixel now changes according to the displayed color. Repeat the test carefully before moving to the next method.
2. Turn the Screen Off for Several Hours
Continuous screen use may sometimes cause a temporary pixel-control problem. Turn off the monitor, laptop, phone, tablet, or television and leave it unused for several hours. Leaving it off overnight may give the display enough time to reset naturally.
Make sure the device is fully powered down rather than only placed in sleep mode. When you turn it on again, test the affected pixel with different full-screen colors. This method is simple, safe, and worth trying before using flashing tools.
3. Update or Reinstall Display Drivers
Outdated or corrupted graphics drivers may send incorrect display information to the screen. This problem is more common on Windows computers, laptops, and external monitors. Updating the graphics and monitor drivers may restore proper pixel control.
Download updates only from Windows Update or the official device manufacturer. When updating does not help, uninstall the graphics driver and restart the computer so the system can reinstall it. Test the pixel again after the driver installation is complete.
4. Use a Pixel-Refreshing Tool
A pixel-refreshing tool rapidly displays red, green, blue, black, and white colors over the affected area. These quick color changes repeatedly activate the subpixels and may help the stuck pixel start responding normally. This method is more suitable for stuck pixels than completely dead pixels.
Choose a reliable tool and place its flashing box directly over the affected point. Run it only for the recommended period and check the pixel afterward. Avoid staring directly at the flashing area, especially if rapidly changing lights cause discomfort.
5. Check Display Cables and Ports
Loose, damaged, or low-quality display cables can cause flickering, unusual colors, lines, and other visual problems. This issue is mainly relevant to external monitors and televisions connected through HDMI, DisplayPort, USB-C, or another cable. A signal problem may sometimes look like a pixel defect.
Turn off the screen and reconnect the cable securely at both ends. Test another cable, port, or connected device when possible. If the dot disappears after changing the connection, the problem was likely related to the signal rather than the physical pixel.
6. Reset the Display Settings
Incorrect resolution, refresh rate, color profile, or monitor settings may affect the screen’s output. Open the display settings and select the recommended resolution and refresh rate for your device. External monitors may also provide a factory-reset option through their on-screen menu.
Resetting these settings returns the display to its original configuration. Restart the device after making the changes and test the pixel again. Avoid selecting unsupported resolutions or unusually high refresh rates.
7. Use the Built-In Panel-Care Feature
Some modern televisions, monitors, and OLED devices include panel care, pixel refresh, or screen maintenance tools. These features help improve pixel uniformity and clear certain temporary image problems. The exact option name depends on the screen manufacturer.
Open the display’s settings menu and follow the official instructions carefully. Do not run a full panel refresh repeatedly because excessive use may increase wear on some displays. Use it only when recommended by the manufacturer.
8. Check the Warranty or Return Policy
When the stuck pixel remains unchanged after safe troubleshooting, it may be permanent or related to panel damage. Review the manufacturer’s defective-pixel policy because replacement rules vary between brands. Some companies require multiple defective pixels, while others provide better coverage for new screens.
Contact the seller quickly when the device is still within its return period. Keep the receipt, packaging, serial number, and clear photos of the defect. Authorized support can confirm whether repair, exchange, or panel replacement is available.
Important Safety Note
When learning How to Fix Stuck Pixel problems, avoid pressing, rubbing, tapping, or using sharp objects on the screen. Pressure-based methods can damage the panel layers, create more defective pixels, or cause permanent dark patches. Professional inspection is the safest option when several pixels are affected or the screen has visible physical damage.
4. Important Tips for Fixing a Stuck Pixel
Stuck pixels may sometimes recover, but every method should be used carefully. Start with simple fixes and avoid anything that can damage the display. Test the pixel after each method before trying the next one.
- Confirm it is not a dead pixel
- Clean the screen before testing
- Start with restarting the device
- Use trusted pixel-refreshing tools only
- Follow recommended tool time limits
- Never press the screen forcefully
- Check warranty before paying for repair
Yes, some stuck pixels may recover through restarting, display rest, or pixel-refreshing tools. Recovery is more likely when the pixel still receives electrical power. However, the result is not guaranteed.
A stuck pixel usually remains red, green, blue, or white. Use a Screen tester to display different solid colors across the panel. The affected pixel will stay fixed while the surrounding pixels change normally.
Follow the time recommended by the tool or screen manufacturer. Start with a short session and inspect the pixel afterward. Avoid running flashing colors continuously for many hours.
Pressing or rubbing the display is not recommended. Excessive pressure may damage nearby pixels and sensitive panel layers. Safe software-based methods should always be tried first.
A temporary graphics or driver error may sometimes create unusual pixel behavior. Updating or reinstalling official display drivers can help rule out software problems. Hardware-related stuck pixels may remain unchanged.
You should Test your Screen again after restarting, updating drivers, and using a trusted refresh method. Stop troubleshooting if the screen develops lines, flickering, dark patches, or more defective pixels. Contact authorized support when the problem remains or the device is under warranty.
Conclusion
So guys, in this article, we’ve covered How to Fix Stuck Pixel in detail. A stuck pixel may sometimes recover through restarting, driver updates, display rest, or a trusted pixel-refreshing tool. Personally, I recommend starting with the safest and simplest methods while avoiding pressure or sharp objects on the screen. Follow these steps carefully and check your warranty if the pixel remains unchanged.

- Be Respectful
- Stay Relevant
- Stay Positive
- True Feedback
- Encourage Discussion
- Avoid Spamming
- No Fake News
- Don't Copy-Paste
- No Personal Attacks
- Be Respectful
- Stay Relevant
- Stay Positive
- True Feedback
- Encourage Discussion
- Avoid Spamming
- No Fake News
- Don't Copy-Paste
- No Personal Attacks
